Thank you for choosing the Exactap NEO. Follow the steps below for proper installation, alignment, and care.
Diagram - Tool nomenclature
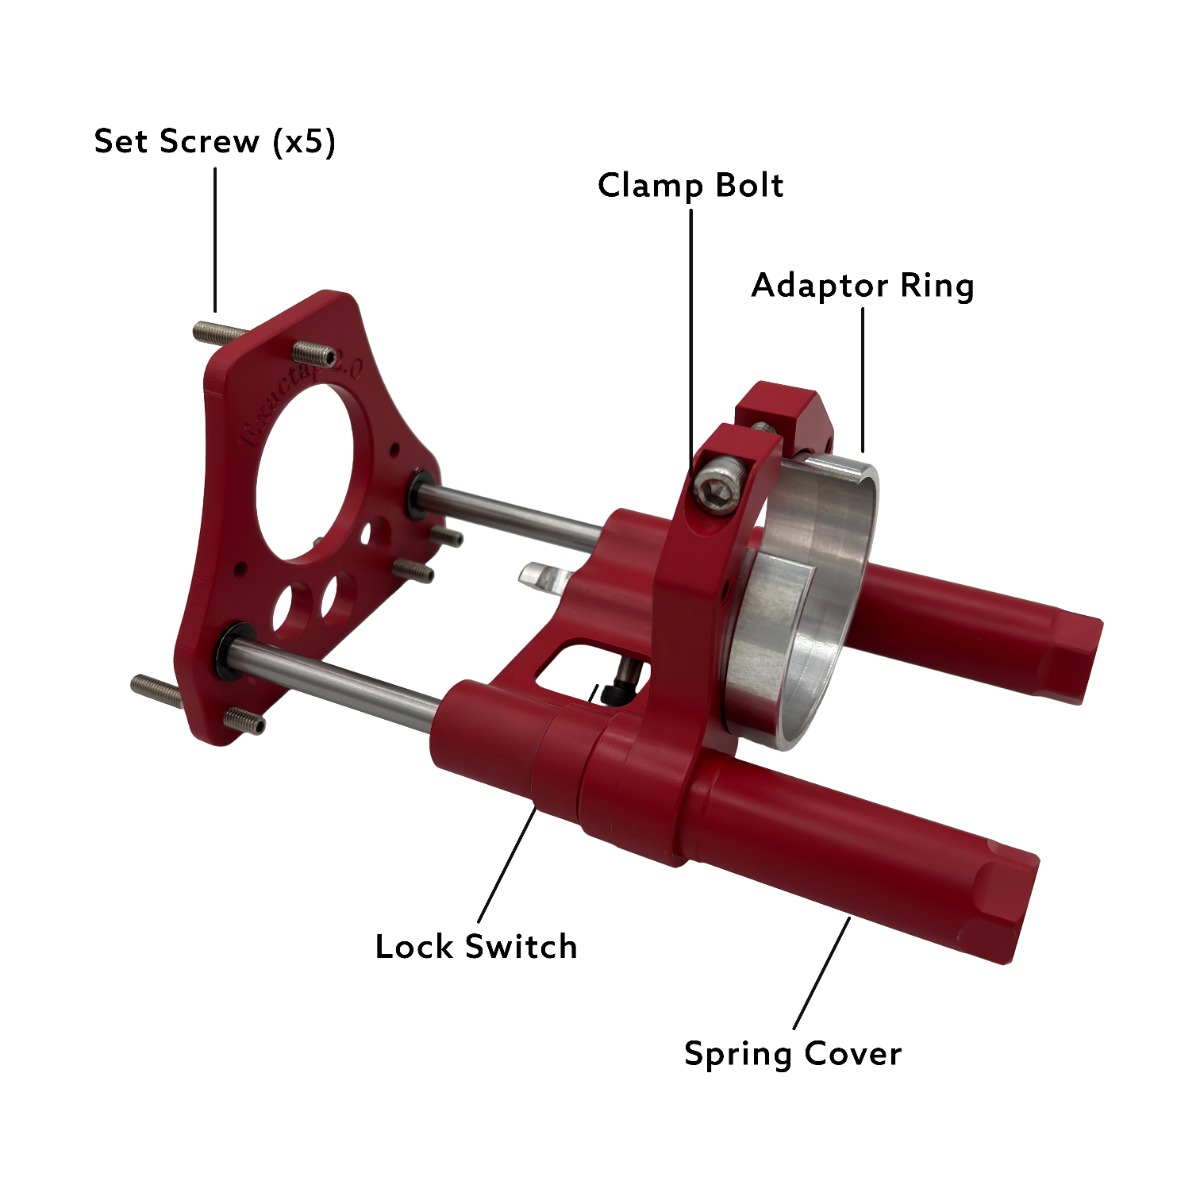
ReferenceUse the diagram below to identify the Exactap NEO components during installation and maintenance.
1. INSTALLATION
StepsStep 1 - Install the drill bit
Insert the drill bit into your drill chuck and tighten securely.
Step 2 - Select the adaptor ring
Use the compatibility chart to select the correct adaptor ring for your drill model.
Step 3 - Install the adaptor ring
Place the adaptor ring onto the drill body:
- Some combinations will snap firmly into place.
- Others will slide on.
Ensure the adaptor ring is properly aligned with the drill body.
Step 4 - Mount the Exactap NEO
Pull the front plate back.
Slide the Exactap NEO onto the adaptor ring and tighten the clamp bolt using the included M6 hex key to ensure proper alignment.
Step 5 - Adjust depth & tapping angle
Adjust the set screws to achieve the proper drilling depth and correct tapping angle for a straight, airtight taphole.
Compatibility chart
Adaptor rings
Note: Other drill combinations may be compatible depending on fit.
* Adaptor ring must be installed backwards.
2. CARE & MAINTENANCE
Before each season- Unscrew the spring cover.
- Apply a light coating of grease to the springs (white lithium grease spray).
- Reassemble carefully.
Important: Do not submerge the tool in water.